YOU NEED
Sewing machine
Serger
Elastic
Washable marker
Sewing pins
Scissors
Ruller
Zipper
Invisible zipper foot
HOW TO
Prepping
Begin by cutting all pattern pieces on the fabric of your choice, keeping the grainline parallel with the selvage of the fabric.
Step 1
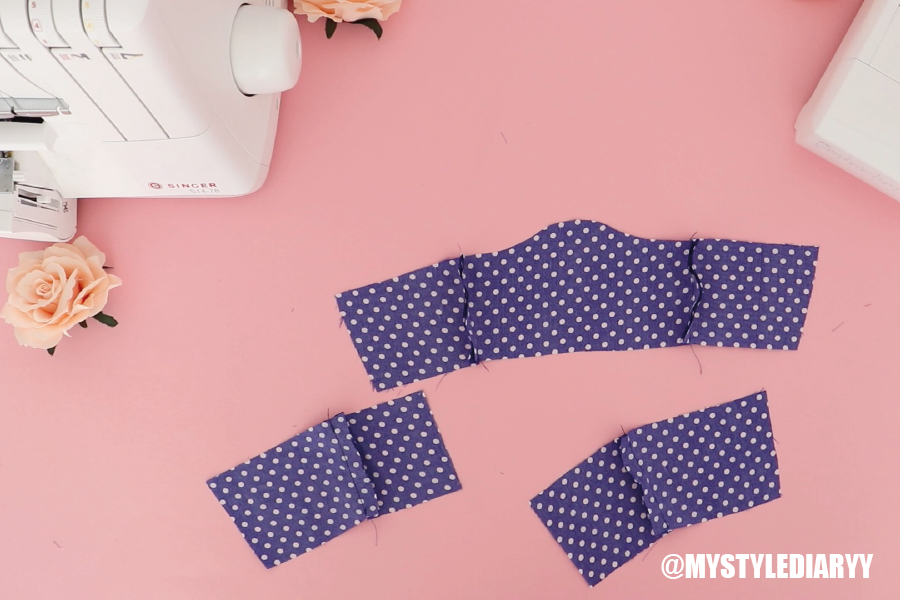
Take the side front pieces and the center front piece and sew them together with the right side facing. Then sew the side back piece and the center back piece together (right side facing).
Step 2
Press all seams open.
Step 3
Serge the edges and seam allowance of the skirt and bodice panels of the previous step. For serging, you can serge everything at the beginning or after sewing a seam to save thread.
Draw guidelines in the sleeves, front- and back bodice with a marker or chalk. This guideline is for the elastic placement this will make it easier to sew the elastic later on in this project.
Step 5
Gather the bottom edge of the front- and back bodice with a gathering foot. If you do not have a gathering foot, You can do it the old fashion way by hand, or you use the basting stitch (biggest stitch) on your sewing machine with the regular presser foot.Step 6
Now match up the gathered panel onto the waist panel with the right sides together, then sew the panels together(right sides together). If you didn't use a gathering food, gather the fabric of the top panel until it matches the width of the waist panel.
Step 7
Place the back panels on top of the front piece and the sew sides seams(right side facing), then follow up with an overlock.
Sew the skirt onto the bodice, make sure that the skirt is touching the plate on the sewing machine.
Sew the bottom edge of the sleeve by folding it once then place the elastic on the guideline and sew it down with a zigzag or a basting stitch. Personally, I prefer sewing the elastic with a basting stitch.
Step 10
Fold the sleeve in half with the right side facing and sew the inner seam with a straight stitch.
Step 11
Next, sew the sleeve to the bodice, follow it up with an overlock.
Step 12
After, sew the off the shoulder neckline by folding the top edge twice (5mm) or fold the top edge one time (1cm).
Step 13
Attach the invisible zipper in the center back with an invisible zipper foot.
Step 14
Close the remaining center back seam of the skirt.
Step 15
The final step, is to hem the skirt hem all the way around by folding the bottom edge one time (2 cm) or by folding the edge twice (1 cm).
Let me know your thoughts and if you have questions let me know below. Feel free to pin the pictures in this post on Pinterest.


3 comments
I'm so impressed! What a lot of skill! Wow!
ReplyDeletethank you so much
DeleteJust made this dress!!! Came out fantastic! Starting to sew another one of your patterns now!
ReplyDeleteFollow the blog to leave a comment! (This is to prevent spam comments )
Note: Only a member of this blog may post a comment.